Considering installing a Greywater Diversion System to your proposed new house?
The best time to install a system is before you build. Talk to your Builder and Plumber prior to commencing or Water Capture can help you through the process.
Consider if a Greywater System is for you. You hate seeing the shower, bath and washing machine water going to waste. You want that water going to your gardens. However, you will need a minimum garden area for it to work. We can calculate this for you.

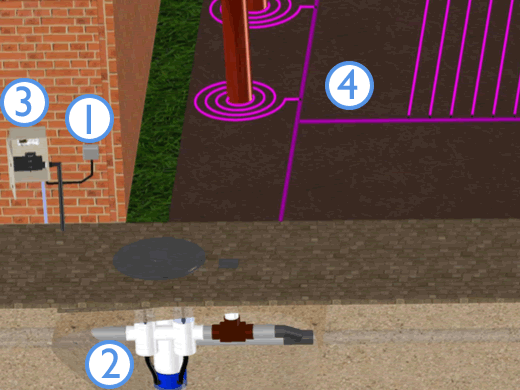
Stage 1: New Homes getting the house ready for greywater - Greyflow PS System
1. Dual piping (separate Greywater and Blackwater pipe)
2. Installing the Grey Flow PS Builder’s Kit
3. Installing an approved Reflux valve
4. Connecting the overflow back to the sewer
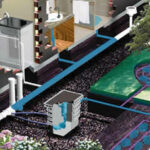
STAGE 1: Greywater Ready Plumbing – Slab down stage of the Build
The drainage plumbing should be configured so that the shower, bath and washing machine waste water (greywater line) travel in a separate pipe, higher in the ground, to the toilet and kitchen waste water (blackwater line). The greywater pipe will eventually join back into the blackwater line at a point past where the proposed greywater unit will go, via a non-return reflux valve. At this point the house is ‘Greywater Ready’, meaning the pipework in the ground can be accessed to install a Greywater unit.
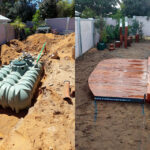
The Greywater ‘Builder’s Kit’ (the interceptor pump tank and filter chambers) can either be installed when the Plumber is laying his pipework in the ground (recommended) or at a later stage. See Stage 1 image of a Greyflow PS System.
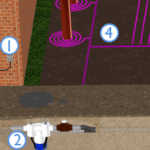
Stage 2: New Homes installing the greywater system and the irrigation components - GreyFlow PS System
1. Dedicated outdoor powerpoint
2. Installing the Grey Flow PS Finishing Kit
3. Installing the Self Cleaning Mechanism
4. Installing the Grey Flow Irrigation System
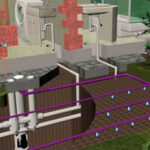
STAGE 2: Installing the Finishing Kit and Dripline Irrigation – Home completion stage
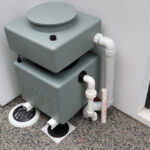
Near to where the Unit has been installed in the ground, we set-up the components to operate the greywater unit. We do this prior to any concreting or paving. The Stage 2 image above shows a cabinet fixed to the homes wall. This operates an automatic self-clean system (recommended).
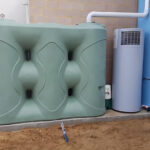
A power point is required here from your builder to run the system and ideally should be on its own RCD circuit. We can determine a suitable sized pump for your application.
A submersible pump provides pressurised greywater to your garden beds. A landscaping plan provided to Water Capture will determine the best areas to direct the filtered greywater to. Lilac transfer pipes send the greywater from the unit to the selected garden areas.

Greywater dripline to a new garden
Fruit trees and garden beds are the recommended areas for greywater dispersal, rather than lawns or vege beds. Specific greywater suitable lilac dripline is used to emit the greywater from the transfer pipework to the gardens with multiple flush points.
Once installed you now have all year around greywater going to your gardens, no watering restrictions and guilt free showers over summer.
In Western Australia the installation of a Greywater Unit needs to be approved by the local Government Authority.
An Application Form together with plans, and depending on your shire a fee, are lodged. An Approval is then given to install the system. Once completed an inspection is made and a Permit given if it complies with certain guidelines.
Water Capture are aware of the guidelines and can lodge Applications.
Greywater systems do require some maintenance.


